
Learning how to draw braids is one of the best ways to level up your hair drawing skills—because braids look complex, but they’re actually built from simple repeating shapes. In this guide, you’ll learn the easiest methods to sketch braids that look clean, realistic, and natural in any art style (anime, cartoon, or semi-realism). By the end, you’ll know exactly how to structure the braid, add volume, and shade it so it doesn’t look “flat.”
Why Braids Look Hard (And the Simple Trick That Fixes It)
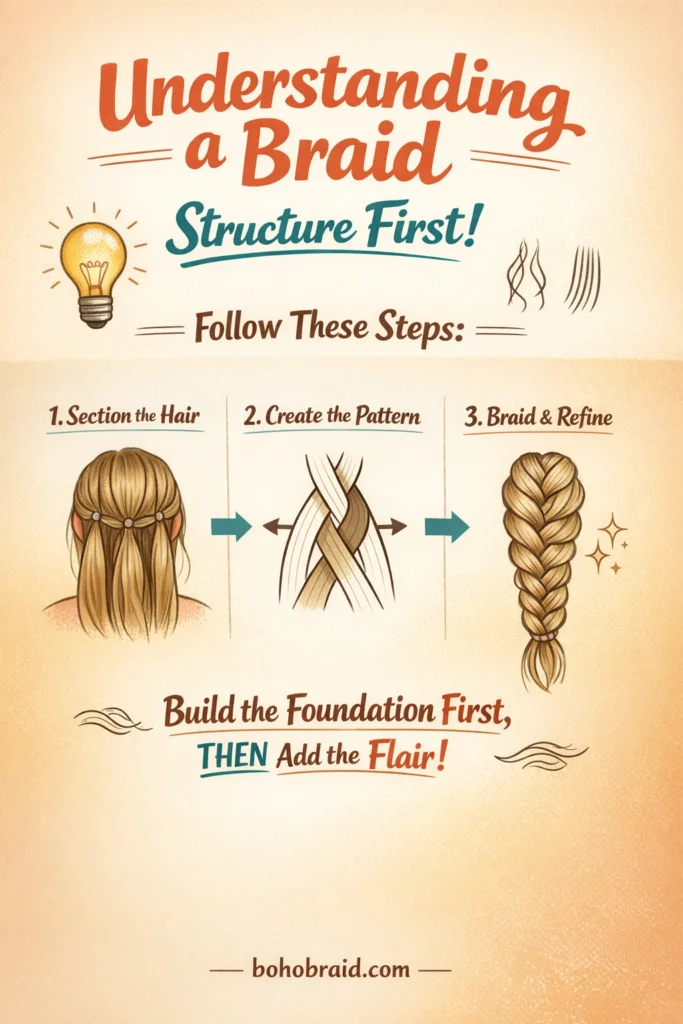
Braids seem difficult because our brain focuses on the details first. The trick is to start with the flow and structure:
- First draw the head + hair direction
- Then draw a guideline (the path the braid follows)
- Build the braid using repeating “links”
- Add strands and shading only after the structure works
This step-by-step approach makes drawing braids much easier.
Tools You Need (Traditional or Digital)
You can draw braids with any tools, but these help a lot:
- Pencil (HB or 2H for sketching)
- Eraser (kneaded eraser is great)
- Fineliner or brush pen (optional for clean line art)
- For digital: a sketch brush + a soft shading brush
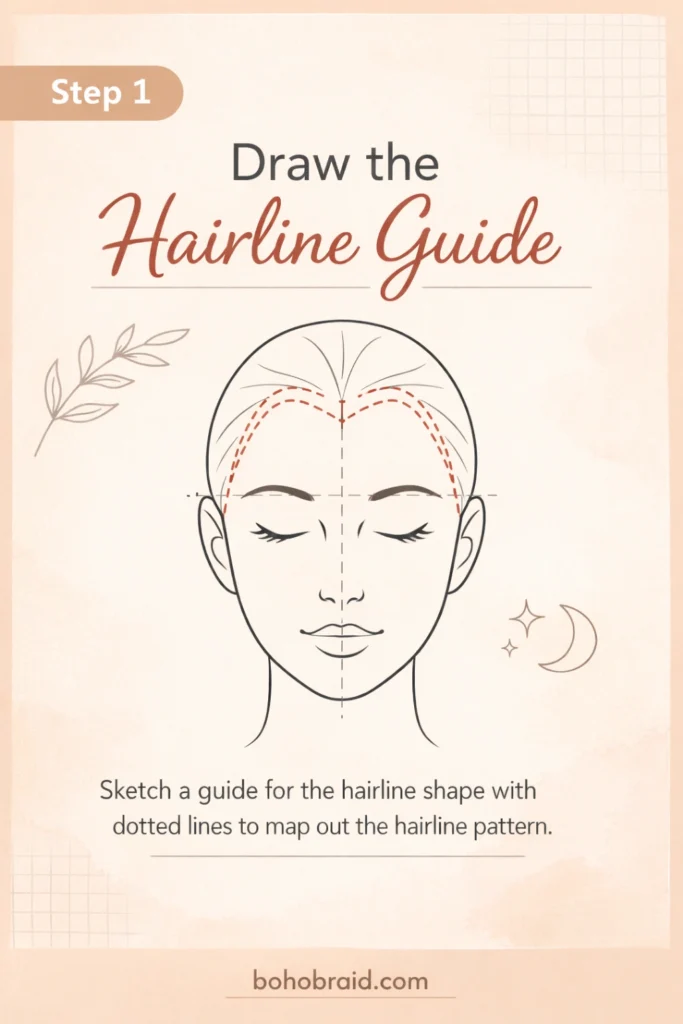
Step 1: Draw the Head and Hairline
Before the braid, place the hairstyle correctly:
- Lightly draw the head shape.
- Add a hairline (don’t make it too sharp).
- Decide where the braid starts: top of head, side, crown, or low ponytail.
Pro tip: Braids don’t start as “braids”—they start as normal hair gathered into sections.
Step 2: Add a Guideline for the Braid Flow
This is the secret to natural braids.
- Draw a single curved line that shows where the braid goes.
- Make it curve slightly with gravity.
- If it’s a long braid, let it taper downward.
Avoid: straight, stiff braids (they look like rope). A gentle curve always looks more realistic.
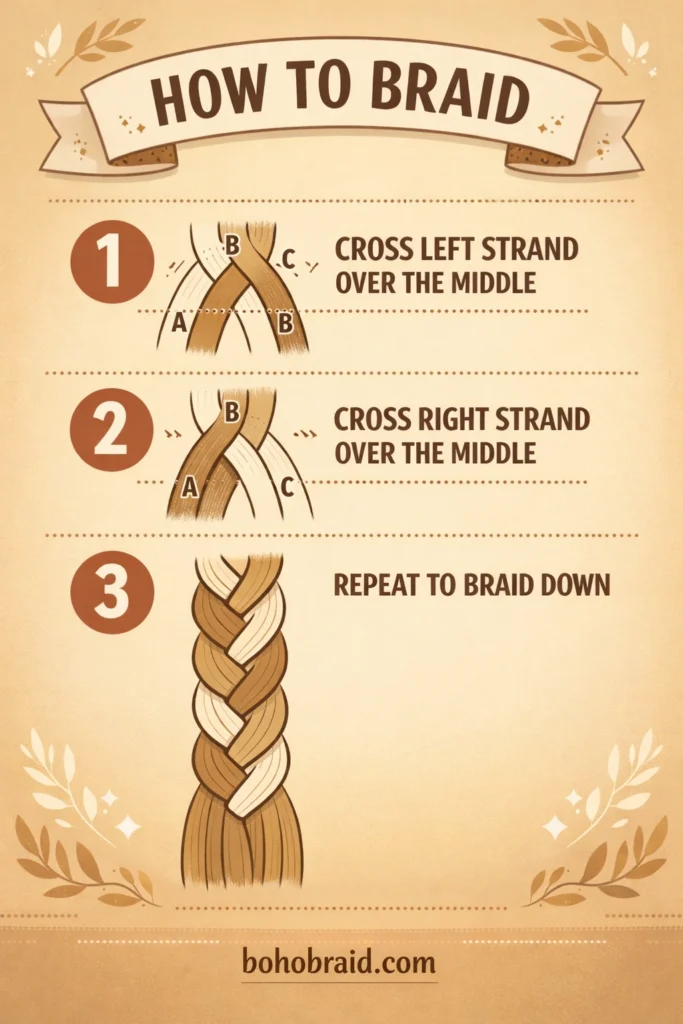
Step 3: Learn the Basic Braid Shape (The 3-Link Method)
Most classic braids are three-strand braids. The easiest way to draw them is using “overlapping leaf shapes”:
- Along the guideline, draw a tilted “V” shape section.
- On one side, draw a curved leaf/teardrop shape crossing toward the center.
- On the other side, draw another teardrop crossing over the first.
- Repeat downward, alternating sides.
Quick rule to remember
Each braid “link” is basically two curved pieces wrapping around a center.
Step 4: Make the Braid Look 3D (Volume + Overlap)
To avoid a flat braid:
- Make the outer loops wider
- Make the inner overlap narrower
- Slightly vary the size of each link (real hair isn’t perfect)
Add thickness
Draw the braid like a ribbon with width, not just a center line. If the braid is facing the viewer, the links look bigger and more symmetrical.
Step 5: Draw Different Braid Angles (Front, Side, and Back)
Front view braid
- Keep the links more symmetrical
- Use a strong center line for alignment
Side view braid
- Links become more compressed
- The far side is partially hidden
Back view braid
- Shows the most even pattern
- Good for practicing clean structure
Step 6: Add Loose Strands (So It Looks Real)
Perfect braids often look “plastic.” Add realism by drawing:
- Small flyaways near the hairline
- A few thin strands escaping around the braid
- Slight unevenness where sections overlap
Tip: Less is more—2–6 loose strands is usually enough.
Step 7: Shade the Braid (The Fastest Way to Make It Look Professional)
Shading is what makes braids pop.
Where shadows go
- Under each overlap (where one strand passes behind another)
- Near the braid’s center depth line
- Under the braid if it rests on the shoulder
Where highlights go
- Along the curves of the outer loops
- In long smooth shapes (hair reflects light in streaks)
Rule: Hair highlight shapes should be smooth and flowing—never random scribbles.
How to Draw Different Types of Braids
1) French braid
A French braid adds hair as it goes.
- Start the braid near the crown
- Each “link” connects to side hair sections
- Draw it tighter near the scalp and looser toward the bottom
2) Dutch braid
A Dutch braid is like a French braid, but raised.
- The pattern looks more “puffy”
- Shadows are stronger underneath the overlaps
3) Fishtail braid
This one uses two sections instead of three.
- Draw many thin overlapping pieces
- The texture is more detailed and “woven”
Common Mistakes When Learning How to Draw Braids
- No guideline → braid looks stiff
- Same-size links → looks artificial
- No overlap shadows → braid looks flat
- Too many strand lines → messy and unreadable
- Ignoring gravity → braid floats unnaturally
Practice Exercises (10 Minutes a Day)
If you want fast improvement:
- Draw 10 braid guidelines (curves)
- Draw 10 “link chains” without details
- Pick 1 braid and fully shade it
- Repeat daily for 7 days
You’ll see a big change quickly.
Conclusion
Now you know how to draw braids using a simple structure-first method: guideline → repeating links → volume → shading. Start with basic three-strand braids, focus on overlap and shadows, and add small imperfections for realism. With a little daily practice, braids will stop feeling complicated—and become one of the most fun hairstyles to draw.
If you want, tell me your drawing style (realistic, anime, cartoon), and I’ll adapt the braid steps to match it.