
Medium large knotless braids are the sweet spot when you want a protective style that looks full, feels lighter than traditional box braids, and doesn’t take all day to install. In this guide, you’ll learn exactly what medium large knotless braids are, who they’re best for, how long they take, how much they typically cost, and—most importantly—how to keep them fresh for weeks with an easy routine. I’ll also share tension-safe tips (your edges will thank you), styling ideas, and a practical prep checklist so you can walk into your appointment confident and leave with braids that look salon-new longer.
What Are Medium Large Knotless Braids?
Knotless braids are installed using a feed-in technique, meaning your stylist gradually adds extension hair as the braid forms—rather than starting with a tight knot at the root. That difference matters because it typically creates a flatter base, more natural movement, and less pulling at the scalp compared with traditional box braids. Beauty editors and hair pros often point out that knotless braids can be a “lower-tension” option for many people, especially around the hairline.
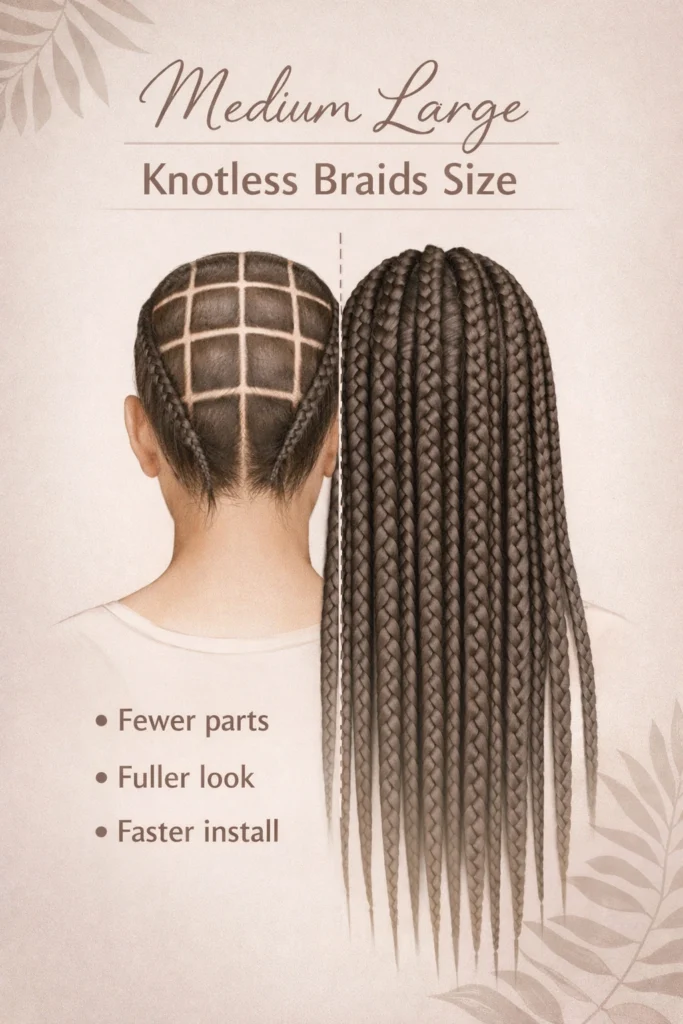
Medium large knotless braids refers to a size category between medium and large—noticeably fuller than medium, but not jumbo. You’ll usually get:
- Fewer parts than medium
- A quicker install than small braids
- A chunkier, trendy look that still feels wearable day-to-day
Why Medium Large Is a “Best of Both Worlds” Size
If you’ve ever struggled to choose between “medium” (more braids, longer install) and “large” (faster but sometimes too chunky), medium large hits a practical middle:
- Time-saving: fewer braids than medium
- Comfort: less weight than super-long small braids
- Style impact: visible parts + bold, defined braids
- Versatility: easy to wear down, in a ponytail, half-up, or in a bun
How Long Do Medium Large Knotless Braids Take to Install?
Installation time depends on your hair density, braid length, and your stylist’s speed. As a general reference, industry guides commonly estimate medium braids around 5–7 hours and large braids around 3–6 hours (with stylist speed and braid length affecting the total).
Real-world expectation for medium large: often in between—commonly ~4–6 hours, though it can run longer in some salons.
What makes install time longer?
- Waist-length or hip-length braids
- Extra-small parts at the perimeter (edges)
- Added curls (boho / goddess finish)
- One stylist working solo vs. two-braider team
How Long Do They Last? (Realistic Wear Time)
With good care, many people aim for 4–8 weeks of wear, depending on frizz, scalp buildup, and how fast your hair grows.
That said, protective styles shouldn’t come at the cost of your hairline. Dermatology guidance warns that hairstyles that pull can contribute to traction alopecia (hair loss from repeated tension), so keeping braids looser and avoiding excessive pull is essential.
Practical rule: keep them as long as they still look good and feel comfortable—never “push through” pain or tightness.
Cost Factors: What You’re Really Paying For
Pricing varies widely by city, salon reputation, hair included vs. bring-your-own, braid length, and add-ons (boho curls, triangle parts, custom color blend).
What typically increases the price:
- Longer lengths (mid-back, waist, hip)
- Higher-quality hair (lighter feel, less tangling)
- Neater parting patterns
- Added curls or human-hair blend pieces
Money-saving tip: If your stylist allows it, bring pre-stretched hair and confirm how many packs you’ll need based on the length and fullness you want.
Best Hair to Use (And How Many Packs)
Most stylists use pre-stretched braiding hair because it’s faster to work with and creates tapered ends more easily. Choose hair that feels light and doesn’t irritate your scalp.
General packing guidance (varies a lot by brand/length):
- Shoulder to mid-back: often ~5–7 packs
- Waist length: often ~7–9 packs
- Extra long or extra full: may require more
If you’re adding boho curls, ask your stylist what curl hair they prefer so the blend looks intentional (not “two textures fighting”).
Prep Checklist (Do This 24–48 Hours Before)
A clean, moisturized base helps your braids last longer and look neater.
1) Cleanse
- Use a clarifying or gentle shampoo
- Focus on the scalp, not aggressive scrubbing
2) Condition
- Deep condition if your hair feels dry
- Rinse thoroughly (product buildup = itch + flakes)
3) Stretch
- Blow-dry on low heat with heat protectant OR banding method
- Stretched hair helps parts look cleaner and braids install smoother
4) Edge strategy
- If your edges are fragile, tell your stylist upfront: “low tension at the hairline.”
The #1 Mistake: Braids That Are Too Tight
Even though knotless braids are often chosen for comfort, any braid can be too tight if installed with high tension. Tight braids increase risk of irritation and long-term hairline stress. Dermatology resources explicitly warn that repeated pulling hairstyles (including braids) can lead to traction alopecia over time.
Red flags
- Throbbing scalp pain
- Bumps, redness, or “raised” parts
- Headache from tension
- You can’t comfortably move your forehead/edges
If it hurts on day one, don’t wait a week hoping it settles—address it immediately with your stylist.
Maintenance Routine: Keep Medium Large Knotless Braids Fresh
A simple routine beats a complicated one. Your goal is clean scalp, controlled frizz, and protected ends.
1) Scalp care (2–3x per week)
- Use a lightweight scalp mist or braid spray
- Massage gently with fingertips (not nails)
- Avoid heavy greases that trap buildup
2) Cleanse (every 1–2 weeks)
- Dilute shampoo in an applicator bottle
- Apply to scalp, massage gently, rinse thoroughly
- Pat dry with a towel; air-dry fully
3) Frizz control (as needed)
- Light mousse + wrap with a satin scarf for 10–20 minutes
- Focus on the roots and mid-shaft where frizz pops up first
4) Night routine (daily)
- Satin bonnet or scarf + satin pillowcase (backup)
- Loose pineapple / low ponytail to reduce tension
- If boho curls: separate curls gently and avoid over-brushing
Styling Ideas That Look Expensive (Without Extra Effort)
Try these with medium large knotless braids:
- Half-up, half-down with clean middle part
- Low bun with two face-framing braids
- High ponytail (only if tension-free)
- Side-swept braid waterfall (great for photos)
- Accessory stack: gold cuffs + braid rings (minimal but polished)
Quick Troubleshooting
Itchy scalp: cleanse buildup, reduce oil, and make sure hair is fully dry after washing.
Frizz at the roots: mousse + scarf set, then lightly oil palms and smooth.
Ends unraveling: dip ends (carefully) in hot water, or use a small dab of mousse and twist.
Too much tension: stop tight ponytails; if the install itself is painful, don’t ignore it—traction risk is real.
FAQs
Are medium large knotless braids good for thin edges?
They can be a better option than tight, knotted installs because the feed-in base can reduce stress at the root—but only if your stylist installs them low tension and you avoid tight styling.
How long should I keep them in?
Many people aim for about 4–8 weeks depending on maintenance and how quickly frizz and new growth show.
Do knotless braids take longer than regular box braids?
Often, yes—because the feed-in technique is more gradual and detailed. Size matters: medium takes longer than large in most cases.
Can I wash knotless braids?
Yes. Focus on scalp cleansing with diluted shampoo and dry thoroughly to prevent odor and buildup.
What length is best for medium large knotless braids?
Mid-back to waist length is the most balanced for many people: long enough to style, not so long that weight and tangling become a daily issue.
Conclusion
If you want a protective style that’s trendy, practical, and easier on the scalp when done correctly, medium large knotless braids are a top-tier choice. You get the fullness and impact of larger braids, the flexibility of medium sizing, and a base that can feel more comfortable than traditional knotted installs. Prioritize low tension, commit to a simple maintenance routine, and protect your braids at night—those three habits alone can make the difference between “messy in week two” and “fresh through week six.”